Continue Lasso Selection After Zooming Out
How To Use The Lasso Tool In Photoshop
Everyone wants a faster and easier way to make selections and cut out images in Photoshop. If you're tired of using complicated tools with confusing settings, let's kick it back and make things easy with a little something called the Lasso Tool in Photoshop. Although this tool is a far cry from the "perfect" selection tool, it does provide a simple way to make fast selections around basic edges. With three different lasso tools to choose from, there's something that will work for a variety of situations.
The Lasso Tool in Photoshop provides an easy way to draw freehand selections around an object. This selection tool's advantage is that it feels a lot more intuitive than other selection tools. However, being that it creates freehand selections, it often needs a lot of refinement before you have an accurate selection.
Even though refinement may be necessary, the Lasso Tool isn't a lost cause. In reality, there are various reasons you might way to use this selection tool over others. Let's dive into each of those reasons, as well as how to use the Lasso Tool in Photoshop.
What Is The Lasso Tool Best Used For?
The Lasso Tool is best used to create selections along simple edges without too many bends or curves. Since it creates selections simply by dragging your mouse, it takes an extremely steady hand to get an accurate selection. That's why this tool is best used in situations where you need a quick and painless selection method. Something like making a selection around a rectangular building or cutting out the smooth edges of a coffee cup.

Since the Lasso Tool creates paths by following the movement of your cursor, this tool is not ideal for making complicated selections. Something like tree branches or hair would be an absolute nightmare to cut out with this tool. Instead, it thrives where there are simple, well-defined edges that you can easily follow along.
I tend to use the Lasso Tool for projects that I need to quickly see how a cut out will look in another photo. Rather than futzing with a more complicated selection method like the Pen Tool, the Lasso Tool gets the job done in less than half the time. Once you have an idea of the selection you want, you can always go back in and refine it with a more precise selection tool.
The 3 Types Of Lasso Tools
The Lasso Tool, by itself, is pretty basic and limited in its uses. Luckily, there are three different types of Lasso Tool in Photoshop that help to make the selection process much easier. All of these tools can be found within the Lasso Tool option or by pressing L on your keyboard. You can hold Shift + L to cycle through each of these tools automatically.
1. Lasso Tool
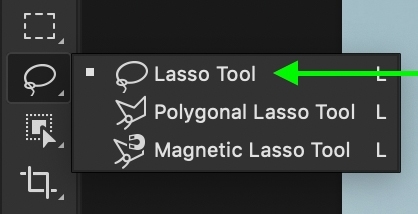
The Lasso Tool is the most basic version you can use. By clicking on a starting point in your canvas, simply drag your cursor around your object to create a path. The Lasso Tool will follow your mouse's exact movements all the way back around to the starting point. From here, it will create a selection that you can use for layer masks or cutting out the image out from the background.
2. Polygonal Lasso Tool
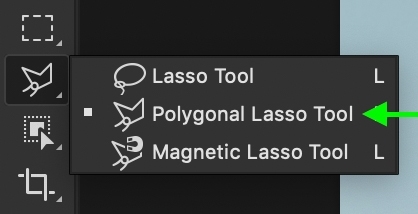
Rather than drawing a freehand selection, the Polygonal Lasso Tool creates straight lines between each click of your mouse. With this tool selected, you can click on a point to begin your path. From here, drag your cursor to another point along your edge to create a second anchor point. The Polygonal Lasso Tool will automatically connect these two points with a perfectly straight line. If you need to cut out something that's box-shaped or has flat edges, this is the Lasso Tool for you.
3. Magnetic Lasso Tool
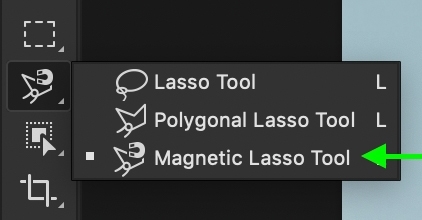
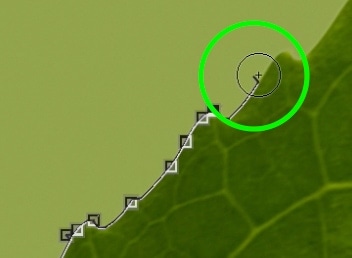
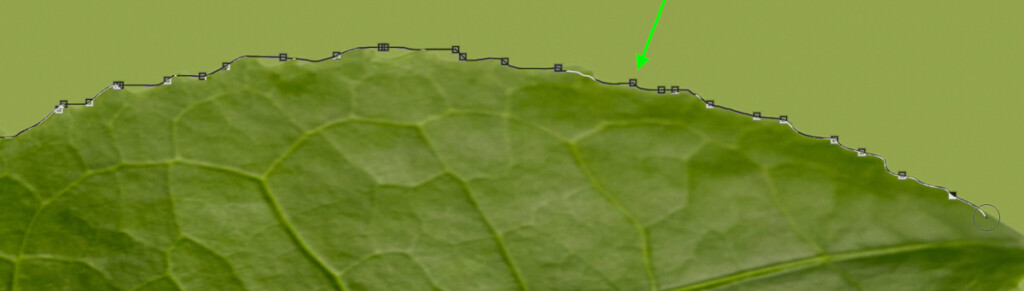
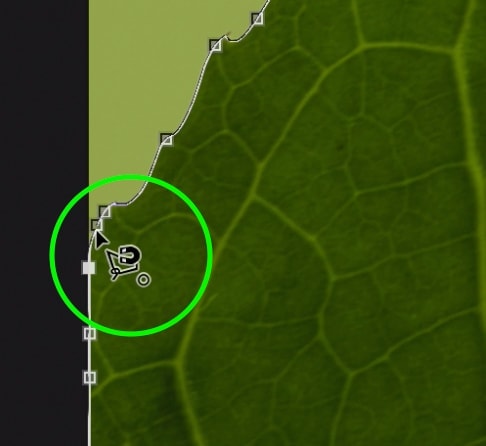
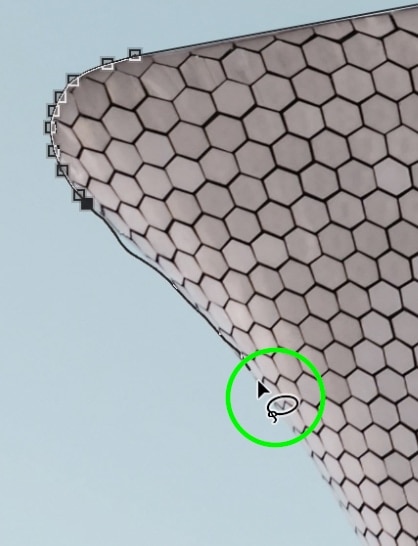
The third type of Lasso Tool is called the Magnetic Lasso Tool. Rather than manually selecting where the path will follow, the Magnetic Lasso Tool is a bit more automated. As long as you're going along a well-defined edge in your photo, this tool will automatically snap the Lasso Path to the edge. Best of all, this even works along complicated or uneven edges like the leaf shown below! The Magnetic Lasso Tool is my favorite version of the Lasso Tool in Photoshop and tends to be my go-to while making Lasso selections.
Now that you have a general idea of how each of these tools works, let's go through them one by one to see how to use them in Photoshop!
How To Use The Lasso Tool
To access the Lasso Tool, press L on your keyboard or find it in your toolbar. This type of Lasso will be a simple Lasso icon like you'd expect to see in a wild west movie.
Before you start to make a selection, take a quick look at your upper setting bar and set the feather radius you want for your selection. For a nice and sharp edge around your selection, leave the feather set to 0px.On the flip side, if you want a nice soft, blurred out edge, increasing the feather radius to something like 20px or 30px will do just that. Whatever you choose, you'll need to settle on this before you start to make your selection!

Next, make sure your selection type is set to "new selection" by clicking on the solid colored square icon.

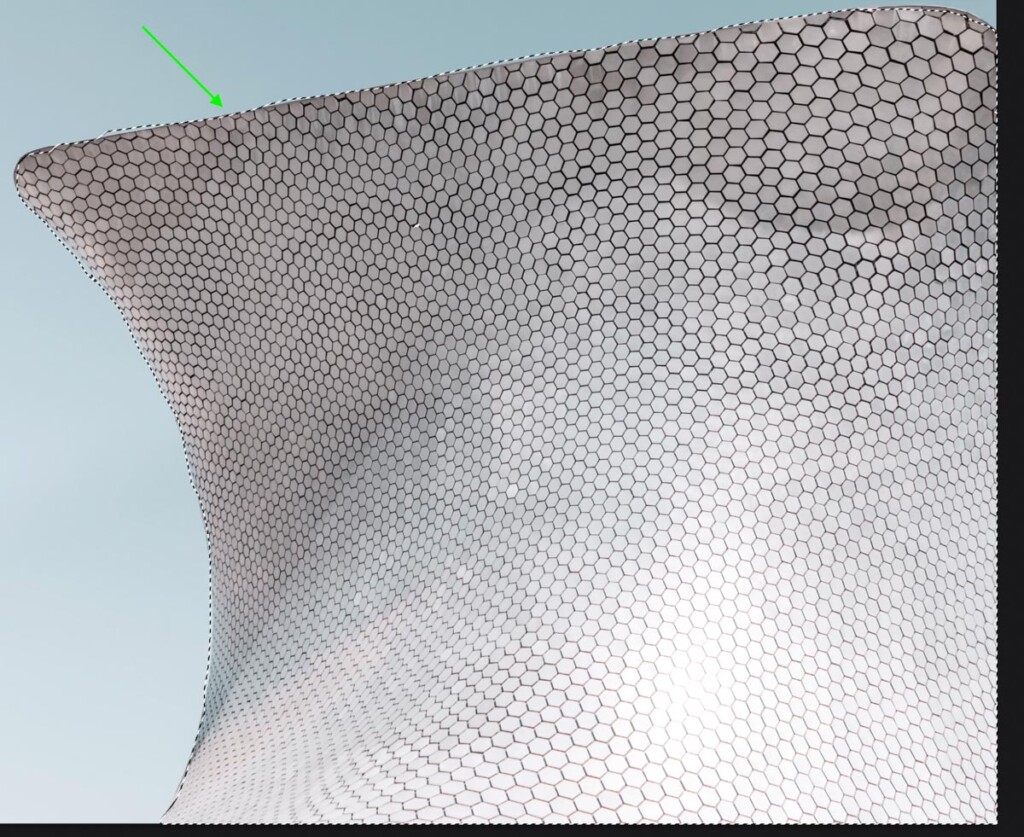
Now it's time to create your selection. Click somewhere along the edge you want to select and begin to drag your cursor along that edge. The Lasso Tool will create a path behind your cursor to be used as your new selection area.
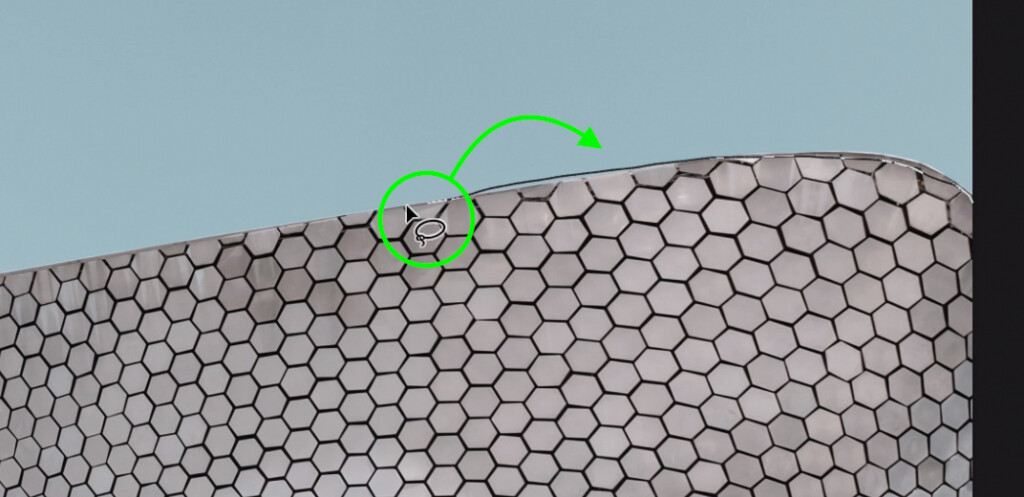
Continue along the edge you want to cut out until you loop back to the starting point of your path. Once at the starting point, click on your path to complete the Lasso selection. The path will change into marching ants to indicate a selection.
From here, you can delete the background, add your selection to a layer mask, or cut and copy your selection area for another image. Simply right-click inside of the Lasso Tool path to see the options you have available to you!

How To Use The Polygonal Lasso Tool
If you're looking to cut out an image with lots of straight edges, then the Polygonal Lasso Tool is the right tool for the job. You can find it by clicking and holding on the Lasso Tool icon in your toolbar. A fly-out menu will appear where you can select the Polygonal Lasso Tool. Alternatively, you can hold Shift + L to cycle through the available Lasso Tools.
Just like with the regular Lasso Tool, there are minimal settings needed to begin working with this tool. Just ensure the correct feather radius is selected to dictate how hard or soft the edge of your selection will be. A 0px feather will give you a sharp edge, while anything higher will add more and more blur around the selection.

Also, double-check that your selection type is set to "New Selection," or else you won't be getting very far!
Click anywhere along the edge you want to cut out to begin the Polygonal Lasso path. Rather than the path following your cursor like before, now you'll need to click to add anchor points for your path to follow.
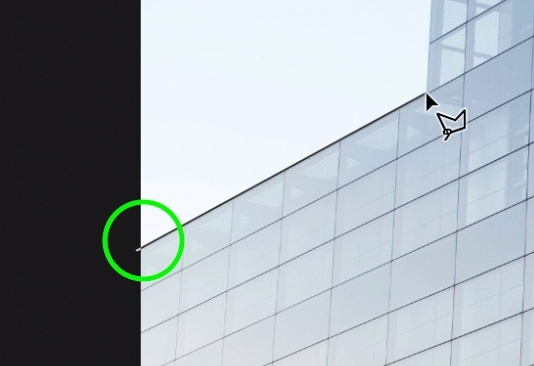
Stretching out your path and clicking along any points where there's a change in direction is all you need to do. Continue this process until you've gone around your object and back to your starting point.
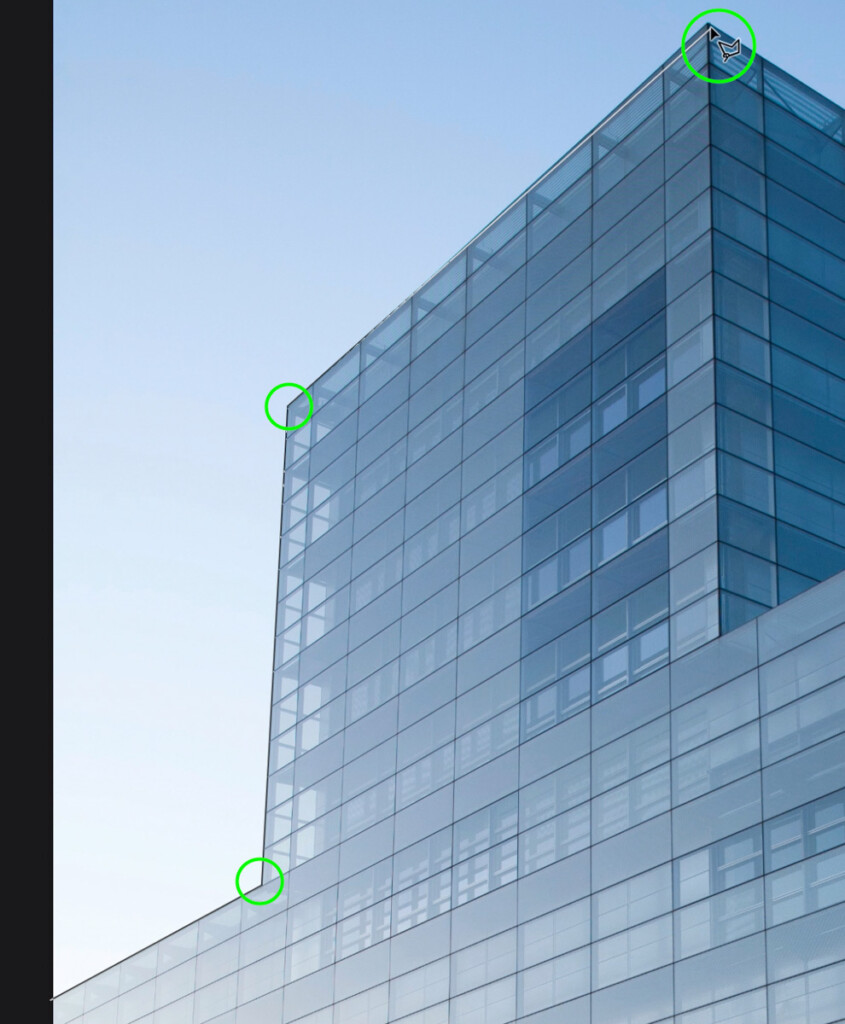
Back at the starting point, click on your path to complete it and turn it into a selection. Just like before, your Lasso path is transformed into marching ants to indicate an active selection. From here, you can right-click inside the marching ants to see the selection options you have.

If you want to remove the background from your image, just click on the layer mask icon in your layers panel to get rid of the background non-destructively.

How To Use The Magnetic Lasso Tool
The easiest (and often most accurate) version of the Lasso Tool is the Magnetic Lasso Tool. This version of the Lasso Tool is also hidden behind the Lasso Tool in your toolbar. That means you'll have to click and hold on the Lasso Tool icon to find the Magnetic Lasso in the fly-out menu. You can also press Shift + L to cycle through the different Lasso tools.
With the Magnetic Lasso Tool comes slightly more settings that you'll need to look into before you begin creating a selection. Let's break them all down one by one.
– Width

While using this tool, press the caps lock key to turn your cursor into a selection brush icon. The size of this icon will help Photoshop to have more or less space to "find" your edge in. Since the Magnetic Lasso will only lock onto an edge that's found within the radius of this selection brush, changing the width value (size) will help to be more precise with your path.


It can be difficult to know exactly how what width to use for the Magnetic Lasso Tool. Luckily, you can change your selection brush's width by using the [ or ] keys to scale the width on the fly. That way, you can get the most accurate width settings possible while in the middle of using the Magnetic Lasso Tool.
Ideally, you want to set a width that's large enough to contain your edge, plus a bit of wiggle room. You don't want to go too much larger than your edge, or else you'll invite Photoshop to lock onto things you don't want it to. Keeping it on the small side will make the Magnetic Lasso Tool the most accurate.
– Contrast

Photoshop can only distinguish edges based on the variance in color or brightness between two objects. For example, a dark-colored object would have far more edge contrast against a white background than it would a black background. Since there's such a big difference between the look of the subject and the background, a dark edge would be easy to identify against a light background. The trouble is, some objects will have a very subtle difference in exposure or color to the background, making it harder for Photoshop to spot where the edge actually is. That's where the contrast setting comes into play.
The contrast value sets the minimum variance to define something as an edge in your photo. By default, this number is set to a low contrast value of 10%, meaning the Magnetic Lasso Tool will pick up on more subtle edges.
If your image has an extremely well-defined edge, increasing your contrast value would ensure that Photoshop only selects that very obvious edge. In most cases, leaving the contrast at 10% is more than adequate.
– Frequency

When you create a selection with the Magnetic Lasso Tool, you'll notice how it automatically creates a series of anchor points to base your path on. The frequency setting simply chooses how frequently a new anchor point is created.
When you're working with an edge that's relatively complicated (has lots of bumps or changing edges), increasing the frequency value can help the tool to be more accurate. Since it has more anchor points to work with, it can be far more specific with the changes of an edge.
On the flip side, having a low frequency will create fewer anchor points along the Magnetic Lasso selection. This can work well on simple, straight edges but will leave room for mistakes along any edges that change direction. By default, the frequency is set to 57. This number is perfect for the vast majority of selections.
With that said, it will be worthwhile to increase the frequency value if you notice the Magnetic Lasso Tool is missing edges between anchor points!
– Creating Your Magnetic Lasso Selection
Now that you understand these three settings unique to the Magnetic Lasso Tool, continue on to adjust the feather of your selection. Once again, if you want a sharp edge around your selection, leave the feather radius to 0px.

Lastly, make sure you have the "New Selection" Lasso type selected.

To create a selection, click on the edge of your path and begin to drag your cursor along the edge. By pressing the caps lock key, you'll reveal the selection brush icon to make it easier to select your exact edge. Moving around your object, the Magnetic Lasso Tool with "magnetically" snap onto the edges of your object. Continue this around to the starting point of your path.

Clicking on the starting point, your path will be transformed into a selection. From here, you can right-click on the inside of your path to select an option for your next step.
To remove the background, just click on the layer mask icon in your layers panel to hide any areas outside of your selection. You can learn more about the importance of layer masks in this post.

Switching Between Lasso Tools While Creating A Selection
Each of the three Lasso Tools in Photoshop serves a unique purpose. From drawing freehand selections to perfectly straight lines to magnetically snapping to an edge. Each tool has a purpose, but each tool can have its flaws. Wouldn't it be nice if you could use all of the Lasso Tools together?
Well, you can! Here's how:
The best way to get full value out of this technique is by starting with the Magnetic Lasso Tool. After starting to create your magnetic selection, you can easily swap between the regular lasso or the polygonal lasso with an easy shortcut.
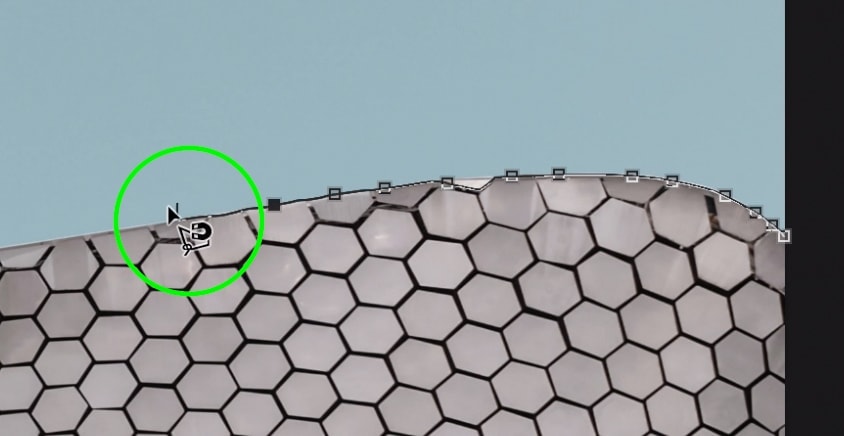
By holding the Alt or Option key and clicking,you'll swap from the Magnetic Lasso to the Polygonal Lasso Tool. This will only last until you click to create an additional anchor point. Afterward, it will switch back to the Magnetic Lasso Tool once again. If you want to continue using the Polygonal Lasso, continue holding the Alt or Option key as you click and add anchor points around your object.
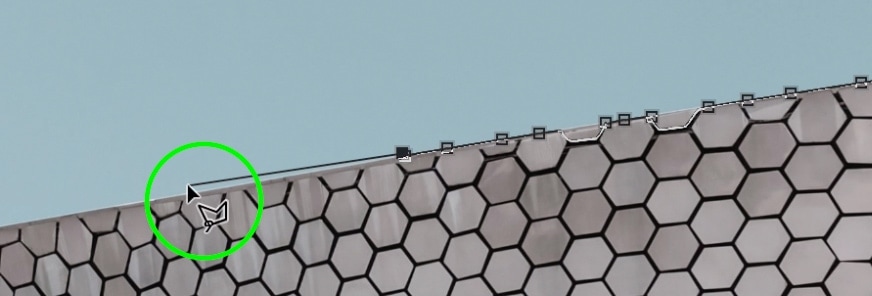
If you want to switch tools to the regular Lasso, once again, hold the Alt or Option key but this time, click and hold your mouse down. This will switch to the Lasso Tool and allow you to draw a freehand lasso selection. Once you let go of the Alt or Option key, you'll be switched back to your Magnetic Lasso once again.
Remember, these two simple shortcuts will change the way you use the Lasso Tool. Individually each of the lasso selection methods has a lot of flaws. However, when you put them all together, you get a pretty solid way to create fast selections in Photoshop.
Refining Your Selection With The Lasso Tools
Unless you have some kind of cyborg talent, there's a pretty good chance your selections aren't perfect. Luckily you can go back and fix any selection made with the Lasso Tools using the easy shortcuts below.
– Adding To Selection
If you didn't select enough of your edge and needed to add to your selection, hold the Shift key, and create a new selection around the area you want to add. Rather than making an entirely new selection, this extra area will be added to your already active selection.


You can repeat this process as many times as needed until everything you need has been added to the selection area. No matter which version of the Lasso tool you're using, this same shortcut will work.
– Removing From Selection
In the case that you went beyond the edge, you want to select, simply hold the Alt or Option key and make a secondary selection around the area you want to get rid of. This will delete this area and help to refine your selection area to the proper edge.


Once again, you can use this shortcut with any of the three Lasso Tools, after you create an active selection.
– Fixing Mistakes Made With Magnetic And Polygonal Lasso Tools
Since the Magnetic and Polygonal Lasso Tools are the only Lasso Tools in Photoshop that create individual anchor points, there's a special shortcut to refine the path with these tools specifically.
If you find that you've gone too far or created an anchor point you want to get rid of, simply press the delete key, and Photoshop will delete your most recent anchor points. You can continue to press the delete key until you're back to the point you want to work from.
This simple shortcut can be a real lifesaver and prevent you from having to start all over!
How To End Your Lasso Tool Path
There are a few different ways you can end or complete a lasso path in Photoshop. The most basic way is to continue your path back around to the starting point. Once back around, click on your starting point to complete the path. This method helps to ensure you have a complete path while giving you total control from start to finish.
On the other hand, your lasso path may start and finish in two different places. In that case, you can click at any point along your path to "complete" the path. Photoshop will automatically create a straight line connecting the start and finish points.

Now, what if you're in the middle of creating a lasso selection and you want to delete it altogether? Well, just hit the Esc key on your keyboard to cancel your lasso path and start back at square one!
Finally, you may have gone as far as turning your path into a selection. If you want to get rid of your lasso selection at this point, you'll need to use the keyboard shortcut Command + D (Mac) or Control + D (PC) to deselect your active selection. You can learn more about deselecting layers and selections in this post.
The Lasso Tool is one of the most basic and easy to use selection tools in Photoshop. By allowing you to make freehand selections, it feels a lot more intuitive than other selection methods in Photoshop. The downside is that this more casual style of path creation allows for more errors in your paths. That's why the Lasso Tool is best used for very fast selections or if you don't need to be extremely specific. Now that you've learned how to use the Lasso Tool in Photoshop check out these other 5 tools for making perfect selections in Photoshop!
Happy Editing!
Brendan 🙂
Source: https://www.bwillcreative.com/how-to-use-the-lasso-tool-in-photoshop/
0 Response to "Continue Lasso Selection After Zooming Out"
Post a Comment